How to create Responsive UI
Goal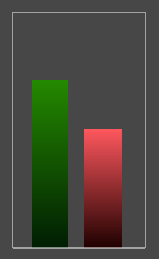
In this tutorial you will learn step by step how you can create one UI which works in Landscape as well as Portrait resolutions.
You will learn how to use the Better Locator as well as Size Config Collections (in this case: for Better Image)
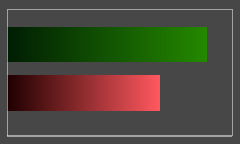
At the end of the tutorial we will have a fake-bar-chart with two horizontal bars in Landscape mode and the same two bars arranged vertically in Portrait mode. The bars will have a nice horizontal / vertical gradient (see pictures on the right).
Note: The bars are just images which we will arrange by hand. This approach is just for demonstrating the responsive features of Better UI. Don't expect any logic for calculating the bar sizes based on some values.
Setting up the Project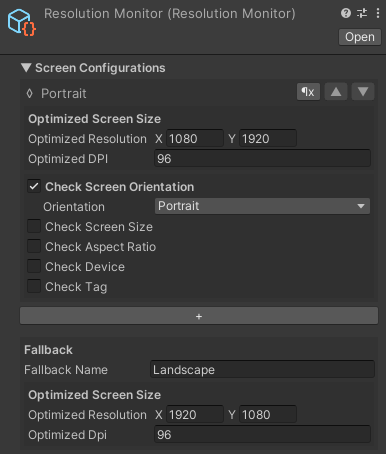
Before we begin, make sure that your project is set up correctly. To not mess with your current project's settings, it is recommended to create a new Unity Project and install Better UI.
For this Tutorial we use a Landscape Orientation as default (Fallback) and an additional Screen Configuration for Portrait Orientation.
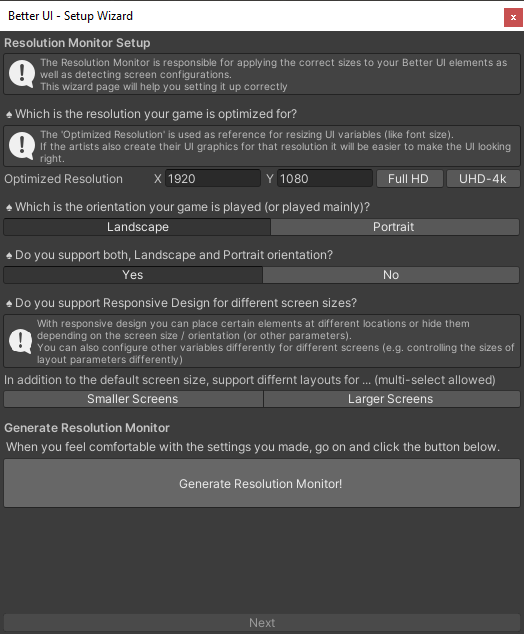
To achieve this, simply follow the Setup Wizard which should automatically start after importing Better UI and answer the second page as shown in the screenshot on the right (first question: "Landscape", second question: "Yes").
You can also configure it manually or change things later on by selecting the Resolution Monitor.
Preparing the Scene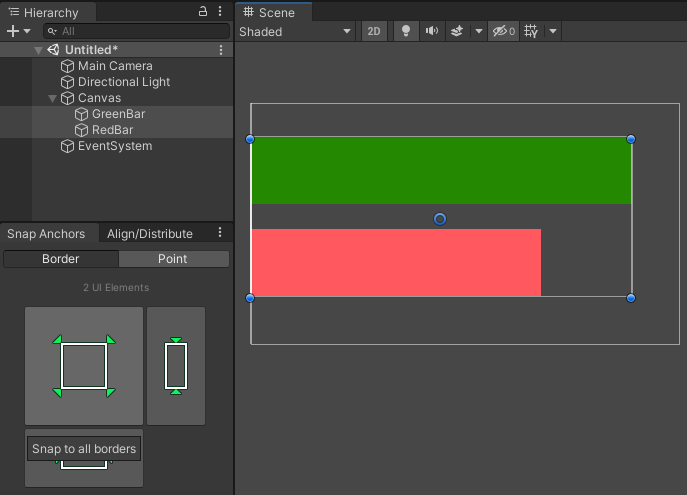
In an empty scene right-click in the Hierarchy and select UI -> Image. This will automatically create a Canvas and EventSystem and puts an ordinary UGUI Image inside the Canvas. Name it "GreenBar" and change the color of the image to green. Then add another image, name it "RedBar" and change the color to red.
Make sure you are working in a landscape resolution (width > height). You may need to change the resolution in the Game View or you use the Pick Resolution Window for it (The game window must be visible when using this, though).
Now arrange the bars in a way that they are horizontally attached to the left side of the canvas and above each other. You may use the Align & Distribute Tool to position them perfectly.
When you are done, you should make sure that the bars scale with resolutions. The easiest way to achieve this is by moving the anchors to the borders of the bars:
Open the Snap Anchors Tool, select both bar objects and hit the big button in the Snap Anchors Tool (Border Tab). If you now change the resolution, the bars will be stretched and shrinked to cover the same percentage of the screen.
Making it Responsive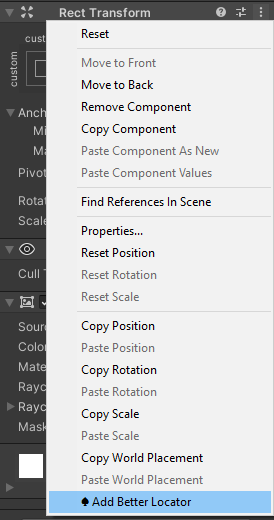
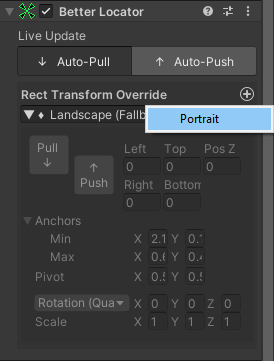
To allow different positions / sizes for different orientations, you need to add a Better Locator to all elements which should be responsive (both bars in this case). To do this, select a bar and right click on the header-line of the Rect Transform (or the three dots on the right upper corner of the Rect Transform) and select "♠ Add Better Locator". After the Better Locator Component appeared, click the Plus symbol in the right upper corner of the "Rect Transform Override" section and select "Portrait" to add transform information for the portrait mode.
Do this for the other bar as well (Alternately you can select both bars at the same time and do all this for both at once).
Note: You should always double check if you have a "Rect Transform Override" for the Screen Configuration you are currently editing. It easily happens that you miss to add the corresponding screen configuration and actually edit the fallback configuration instead.
Now change to a portrait resolution (height > width). You will notice that the Landscape-Section collapsed in the Better Locator and the Portrait section expanded. This tells you that the Portrait screen configuration was detected and is active now. As long as "Auto-Pull" is toggled, any position / size or rotations changes are automatically applied to the Rect Transform Override of the currently active configuration.
All you need to do now is arrange the two bars in a way that they are going upwards and are positioned next to each other. You can use the Align & Distribute Tool again and you should Snap Anchors when you are done.
Note: Your intuition may want to rotate the bars rather then resizing them. While this is also possible, it is not recommended. Having rotated / scaled UI elements makes it much harder to correctly display them at different resolutions. Also positioning children of scaled / rotated objects can be counter intuitive in context of UI. So, whenever possible change the sizes of your elements instead.
Make it Better and add Gradients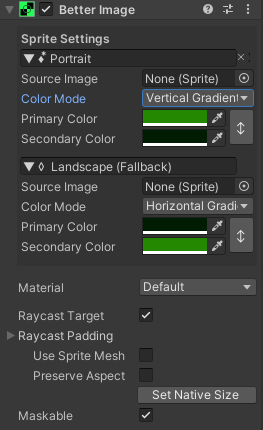
Often you need to change certain settings based on the Orientation (or other Screen Configurations). For such cases Better UI allows to define different settings per Screen Configuration.
For this example we want to have gradients for the bars.
To start, switch to a landscape resolution again. Then select one of the bars and and Make it Better (right-click on the "Image" component header and select "♠ Make Better").
In the Sprite Settings of the Better Image, change the "Color Mode" to "Horizontal Gradient" and pick a second color. Then switch to a portrait resolution (The gradient will look wrong now). Hit the Plus-Button next to the Sprite Settings Header and select "Portrait". In the newly appeared settings change the Color Mode to "Vertical Gradient" and pick the right colors (don't forget to make sure that the alpha value is 1).
Do the same for the other bar.
Note: Because of technical difficulties the colors of the image are the default value (transparent black) when adding a setting for another screen configuration. This will likely change in a future version of Better UI to offer the best possible user experience.
Other Interesting Topics
When it comes to responsive design, Better UI offers many other options to configure the UI for your needs. Here is a list of topics which might be interesting as well:
- Size Config Collections are on all Better Components where it makes sense. They are usually used for Size Modifiers to control the size of certain variables (like Font Size). However, similar to the Sprite Settings for Better Images they are used for some handy other options as well:
- In the Better Axis Aligned Layout Group you can define if it acts like a Horizontal or Vertical Layout group (among other settings)
- Similar settings are present in the Better Grid Layout Group
- The Better Content Size Fitter allows to change the constraint direction per screen configuration
- Also special Components like Size Delta Sizer (to control the size without anchors) or Anchor Overrides (to link anchors to another object) and even Location Animations (to animate transformations) provide dedicated settings per Screen Configuration
- If you need to show or hide certain elements based on the screen configuration, you can use the Game Object Activator
- Besides Landscape / Portrait you can have a lot of different kinds of Screen Configurations. Whenever you want to display something different based on certain conditions, you most probably can solve this via Screen Configurations.